How to Replace Recessed Lighting

When it comes to enhancing the ambiance of your living spaces, few things are as impactful as lighting. Recessed lighting, with its clean and modern aesthetics, has become a popular choice for homeowners seeking to transform their homes into inviting, well-lit sanctuaries. Yet, over time, these fixtures may require replacement due to various reasons, such as outdated technology, wear and tear, or a desire for a fresh and updated look.
Chesapeake Electric is going to walk you through the process of replacing recessed lighting, from the initial assessment of your existing fixtures to the final step of basking in the warm glow of your newly installed lights. No matter your level of experience, you’ll find valuable tips, safety precautions, and step-by-step instructions to help you illuminate your space effectively and efficiently.
What is Recessed Lighting?
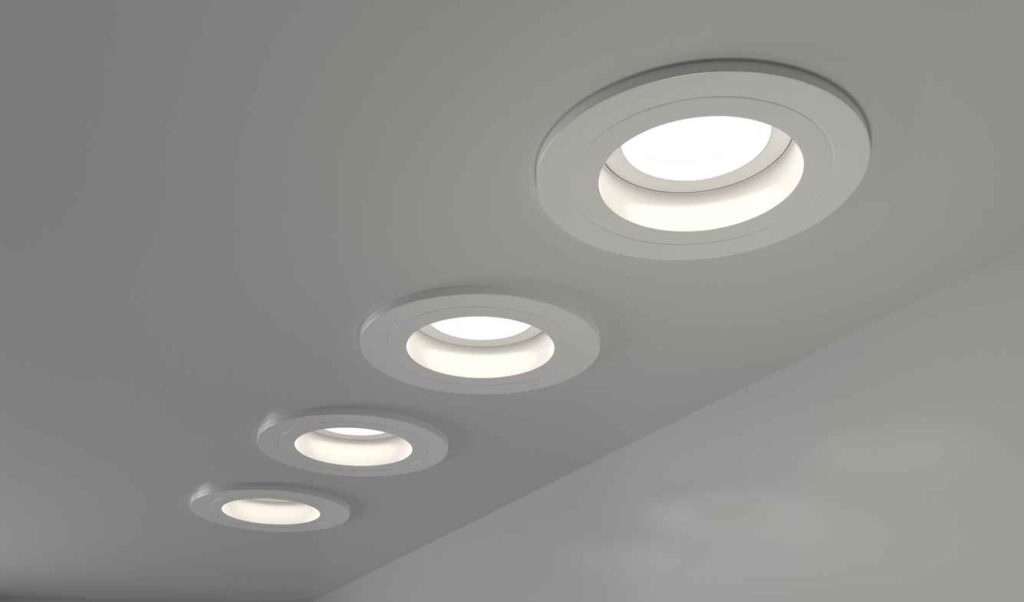
Recessed lighting, often referred to as can lights, downlights, or pot lights, is a type of light fixture that is installed into the ceiling or wall of a room in a way that the fixture itself is hidden or “recessed” from view. These fixtures are designed to provide a streamlined and unobtrusive source of illumination in homes and commercial spaces.
Signs It’s Time to Replace Your Recessed Lighting
Recessed lighting is a popular and versatile lighting option, but like any fixture, it may need replacement over time. Here are some signs that indicate it’s time to replace your recessed lighting:
- Flickering Lights: If your recessed lights are flickering or intermittently going on and off, it may be a sign of a loose connection, a failing bulb, or a problem with the fixture itself. Replacing the fixture or addressing the electrical issue may be necessary.
- Inconsistent Illumination: When some of your recessed lights are significantly dimmer than others or provide uneven illumination, it could be due to issues with the wiring, the trim, or the housing. Replacing the problematic fixtures or components can help restore consistent lighting.
- Buzzing or Humming Sounds: Unusual sounds coming from your recessed lighting fixtures, such as buzzing or humming, may indicate a problem with the transformer or ballast. These components can wear out over time and may need replacement.
- Yellowing or Cracked Trim: Over time, the trim on recessed lighting fixtures may become discolored or develop cracks, which can affect the appearance of the lights. Replacing the trim is a relatively simple way to refresh the look of your fixtures.
- Outdated Technology: If your recessed lighting still uses incandescent bulbs or older lighting technology, you may want to consider upgrading to energy-efficient LED fixtures. LED lights consume less energy and have a longer lifespan, reducing maintenance and operating costs.
Regular maintenance and occasional replacements are essential to ensure that your recessed lighting continues to provide efficient, safe, and visually appealing illumination in your home or commercial space.
Tips for Replacing Recessed Lighting
Replacing recessed lighting involves several steps, from removing the old fixture to installing a new one. Here’s a step-by-step guide on how to replace recessed lighting:
Step 1: Safety Precautions
- Turn off the power to the existing recessed lights at the circuit breaker to prevent electrical shock.
- Put on safety glasses and work gloves to protect your eyes and hands during the process.
Step 2: Remove the Old Fixture
- Climb a ladder to reach the recessed lighting fixture.
- Gently pull down on the trim to reveal the bulb and the mounting clips.
- Use a screwdriver to remove any screws or clips holding the fixture in place.
- Carefully pull the old fixture down from the ceiling, exposing the wiring.
Step 3: Disconnect the Wiring
- Use a non-contact voltage tester to ensure there is no electricity running to the wires.
- Disconnect the wires by twisting off the wire nuts that connect the fixture’s wires to the house wiring. There will typically be three wires: black (hot), white (neutral), and green or bare (ground).
- Carefully remove the old fixture and set it aside.
Step 4: Install the New Fixture
- Connect the new recessed fixture to the existing house wiring. Typically, the fixture wires will be color-coded:
- Connect the black wire from the new fixture to the black (hot) wire from the house.
- Connect the white wire from the new fixture to the white (neutral) wire from the house.
- Connect the green or bare wire from the new fixture to the green or bare (ground) wire from the house.
- Secure these connections using wire nuts and wrap them with electrical tape.
- Carefully push the wires and the attached fixture up into the housing until it is flush with the ceiling.
Step 5: Attach the Trim
- Attach the trim or baffle to the new fixture by following the manufacturer’s instructions. This typically involves aligning the trim with the housing and twisting it into place.
- Some trims may have clips or screws to secure them in position.
Step 6: Turn on the Power
- Go back to your circuit breaker and turn the power back on for the recessed lights.
Step 7:
- Screw in a light bulb or LED module into the new fixture.
- Turn on the switch to check if the new fixture is working correctly.
Step 8: Adjust and Finish
- If necessary, make any adjustments to the direction or angle of the new fixture to achieve the desired lighting effect.
That’s it! You’ve successfully replaced your recessed lighting fixture. If you encounter any difficulties or are unsure about any step, it’s advisable to consult a qualified electrician to ensure the safety and functionality of your new lighting installation.
Recessed Lighting Services in Annapolis, MD
Chesapeake Electric is your trusted partner for all your recessed lighting needs in Annapolis, Maryland. Our team of skilled professionals is dedicated to illuminating your space with expertise, precision, and a commitment to top-notch customer service. Whether you’re looking to upgrade your existing lighting, enhance the ambiance of your home, or need specialized solutions, we have the knowledge and experience to bring your vision to life. Contact us today to schedule your service.
Recent Posts

January 23, 2026

January 22, 2026

January 21, 2026

December 19, 2025

December 19, 2025

December 19, 2025

November 21, 2025